Your Cart is Empty

Delivered every working day, our email newsletter inspires the world's greatest sports innovators to create the future of sport. Enter your email below to subscribe - it's FREE!!!!
Tennis, like all sports, is becoming electronic. The number of new tennis sensors is growing ten-fold each year. One of the crowdfunding success' was Qlipp, described as the ultimate peformance sensor. We asked one of our ambassadors, Oli Bonar, for an independent review of the Qlipp whilst coaching at Loughborough University. Here are his thoughts...
"I’ve been trying out the QLIPP sensor for the past week and bit now, using it for my own personal development as a player, as well as for my coaching sessions. In this review I will be covering set up, usage and how to use the app, everything you need to know as keen tennis player or coach."
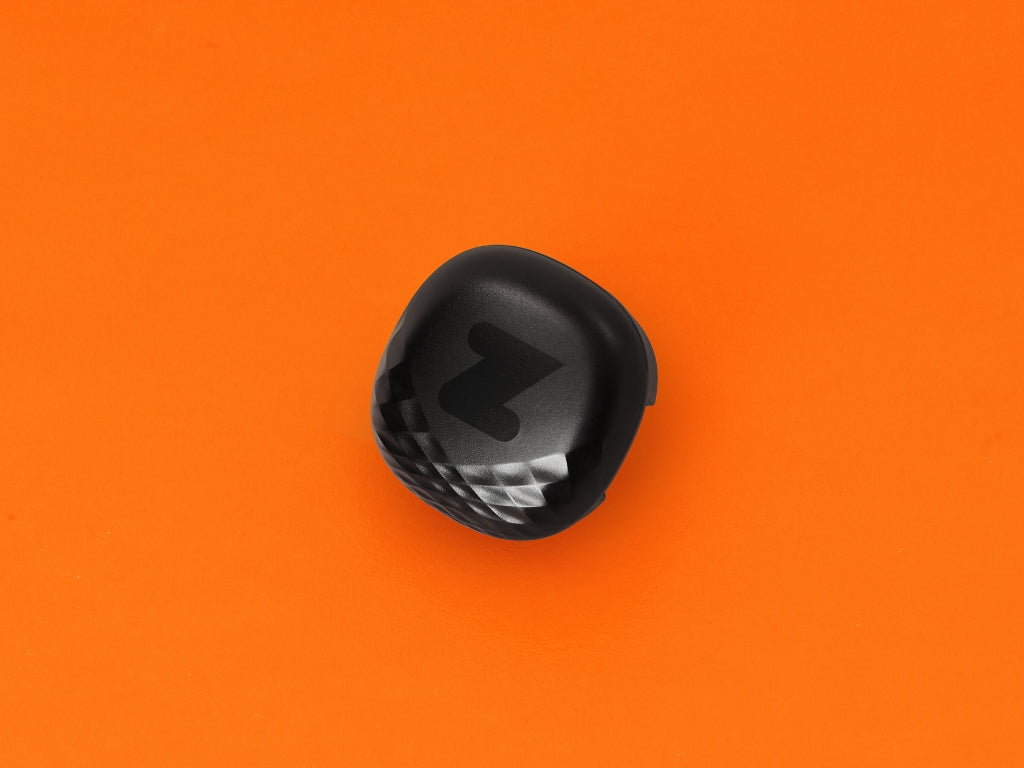
The sensor comes in a small box, with the minimal packaging inside. The dimensioning of the box is 136 x 136 x 30mm, which means it could fit through a letterbox. It consists of the sensor and a USB cable, so very simple

As you can see from the photos, the sensor is larger, than the shock absorbers I have. The sensor’s dimensions are 30.3 x 26.7 x 10.7 mm, whilst the largest shock absorber (hexagonal Dunlop) is 25.3 x 23.2 x 7.0 mm. It’s not much, but you can definitely notice the difference.


First you’ve got to download the app, which is free onto your smartphone IPhone or Android. You can also use the app on your apple watch, which is great as you can see your session unfolding on your watch, instead of constantly checking your phone. You then register yourself by giving your email and password. You then input data about yourself, age, gender, what hand you play tennis with, how you want data to be interpreted into Km/h or Mph and your email address. After that you are good to go.
How 
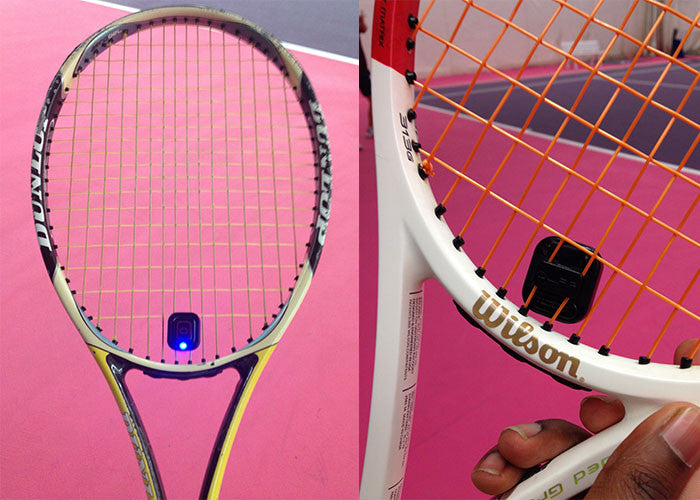
First you’ve just got to press the button on the front of the QLIPP and it will begin to flash blue, showing its on. You then turn on your Bluetooth and your phone will connect to the QLIPP. You will know if it’s connected when your phone says ‘QLIPP connected’. You can also see a battery icon at the top of the menu, which shows your phone is connected to the QLIPP. Press play and you are ready to go.

When you have finished your session, just press ‘DONE’ in the top right of the screen and it will give you an overview of the session. To turn off the QLIPP hold down the button for 5 seconds and it will stop flashing blue. Simple and straight forward so far.
The sensor takes a bit of effort to put on and align with the strings. I had to squeeze the strings either side of the sensor, so they didn’t move out of the way; otherwise, only one side fits into the gap, while the other one won’t fit and will come off later when hitting. I tried using the method the tutorial suggested, by pushing the top of the clip forwards, to get the knobs underneath the strings, but it didn’t really work for me. However, when you do after a bit of fiddling you are good to go.
After your session it’s very difficult to take off, especially when the strings in your racket are tight. At the end of the first session with the QLIPP, it took me a good 10 minutes trying to get it off. However, over time I worked out how to take it off quicker within a minute, by pushing up the strings, whilst twisting and pushing down on the QLIPP to get it off. Still quite a bit of effort.

If you are having difficulty setting up the QLIPP, there is Tutorial on the side menu bar which has 2 animations showing you how to attach the sensor and how to turn the QLIPP on and off, which is quite useful.

So now that we have set it up, let’s see what information it tells us about our performance after a session.

Once you’ve finished your session and pressed ‘DONE’, you come to this Overview page, which gives you summary of your session, telling you how many strokes you played, the longest rally you had, the highest speed you recorded and how many strokes/ min you average. If you scroll down the page, you can find out how long you played for, the average speed, how close you hit the ball to the sweetspot, how much spin you put on the ball and turns this information into a score for your session. This score will influence your global ranking, which I talk about later on in this review.

By going through the menu bar along the bottom, you have a selection of options, ‘SUMMARY’, ‘LOG’, ‘BREAKDOWN’ and ‘SKILLS’. For ‘LOG’ it tells you at what time you hit your shot, what type of shot it was you hit, the speed of the shot, how close to the sweetspot you hit the ball and if you put any spin on your shot.
In the ‘BREAKDOWN’, at the top of the page you get a pie chart which tells you how many of each shot you hit and hitting the ‘more’ tab below, you can see how many from your forehands, backhands, serves were hit with top spin, flat or with slice. It also tells you the speed of your shots, giving an average and a top speed, as well as, giving a breakdown speed of shots with spin. You also receive information about where you hit the ball on your racket, the closer you hit the ball to the sweetspot, the higher your score. Again like the speed section, you can break it down to see where you hit the ball for different spins. If you do any serving in your practice, 2 additional pieces of information are displayed, telling you whereabouts the of your angle of impact is. You also find out how long your service duration is, broken down into racket preparation, acceleration of the racket and the follow through. Finally, the spin power tells you how much spin you are putting on your top spin and slice. It gives a value (0 to 100) to represent the amount of spin imparted onto the ball in your topspin/slice strokes. According to QLIPP, it doesn’t measure in Revolutions Per Minute(RPM), as it can vary a lot depending on string / spacing of racquet used. Instead it is a comparison of your hitting to QLIPP’s Pro-athlete. 0 being no spin and 100 being maximum detectable spin.
In ‘SKILLS’, it gives you a graph telling you how consistent your hitting is, based upon where you hit the ball on the racket. The Heaviness is an estimate of how "heavy" or powerful the particular stroke is, by combining speed and spin. For example:
Stroke A: stroke with high speed but very low spin
Stroke B: stroke with lower speed than Stroke A but higher spin
In this case, your opponent should feel that Stroke B is heavier than Stroke A due to the combined effects of the speed and spin.

If you go to the side menu and tap the Compare tab, you can see where you rank around the world according to your score, which is averaged over your scores from all your sessions up-to-date. You can also see how you rank in the monthly stroke rankings. These are great if you are player who wants to improve and these rankings can be used to motivate you to practice more, in order to move up the rankings.
Another feature is the ‘VIDEO’, where you can film a player’s performance. The clip continues to collect data, whilst you’re recording. This means when you finish the session and play it back, you can see the data about the shot as the video plays through. You can also slow down the frame rate, to see the technique much better.
To find out what people thought of the QLIPP sensor, I went to Loughborough University to ask some of their players and coaches, from Recreational (Players with No LTA Ranking- 8.1), Development (Players with 7.2- 4.2 LTA Ranking) and Performance (Players with 4.1 and above LTA Ranking) to find out what they thought of the sensor. I let them just play with it for a session and at the end asked for their feedback. This is what they had to say:
For the Recreational Players, a few players found that you notice the vibration if you are use to playing with a shock absorber. Some of the higher end of recreational players found that the data wasn’t useful for them. For example, telling where they are hitting the ball on your racket, but it didn’t tell you how they could improve their consistency of hitting the sweetspot, which they would have appreciated. However, they did like how you could track your speed, but weren’t sure how accurate it was though, with 2 serves being recorded as 27 mph and 18 mph, despite looking as fast as others, which were hitting the 80 mph area.
The feedback was somewhat similar from the Development Players, who found it difficult to put on and said they didn’t notice the sensor, until you hit the sweet spot, were they said “it felt different”.
For the Elite Players, I asked a player who has Junior ITF of 390 and was in the Men’s Top 4 for Shri Lanka. He found that it felt large on the racket, saying: ‘It doesn’t feel natural… can feel a difference in weight and loss balance of racket’. Again like development, he found not easy to put on and straighten up.
The general feedback from the players themselves didn’t seem to like it so much, however the coaches had more positive feedback.
They said they would use it for coaching, but for specific training, such as serves or to encourage top spin. However, they wouldn’t use it often, as you wouldn’t use it in a match, as it’s a grey area in the rules by the ITF about technology and maybe considered as coaching. The coaches also said it would work well if you want to give an individual a private session, as you can see their progress over each session. Furthermore, they liked the videoing element to the app, especially with slowmo. However, thought it would be better if you could annotate the videos or play 2 videos next to each other, to compare the different styles, something similar to Dartfish video analysis.
From other players and coaches there are mixed views on the QLIPP sensor, so I’ll throw my views in on it. Let’s look on the advantages to it; it provides me useful data which I can use for my coaching, especially when I’m coaching beginners, as a visual aid it will help them learn and they can see what they are doing wrong. I also like the use of the video analysis element, which works alongside the data being collected, so you can see at what point you make contact and analyse that shot from that data.
However, it can occasionally miss call the shot which was played, calling a forehand a backhand, which will mess up your statistics. Also if you’re going to use the slowmo and your phone is up to date, your camera should be ok when you slow it down to a 1/8th of the speed, but when I was filming with my IPhone 4s, the frames were blurry due to the camera.
Overall, I would use the QLIPP sensor mainly for my coaching, particularly beginners and occasionally intermediate players, if there is something wrong in their technique and I can’t quite see what it is. For a player who are using it on their own, it isn’t too great because if you’re a beginner it tells you where you’re going wrong, but it doesn’t tell you what you can do to improve it. If you’re a more experienced player, you wouldn’t use it, as you know what’s going wrong and you know how to change it. Furthermore, the cost £99.99 is quite an investment for a product which you would only use for certain situations, which is quite off putting.
I think QLIPP need to sort out a few areas, an easier way to attachment the sensor to the racket, being able to do more with the video analysis and maybe a way providing feedback for players who are training on their own. Apart from that it’s a step in the right direction to making a great product.
I would rate the QLIPP sensor 7/10.
The Qlipp sensor can be purchased from Kit Radar for £99.99.
Oli joined our ambassador program in 2016, and has now received a free Qlipp in exchange for this review. You can see that it is very truthful and in Oli's words. If you liked this review please comment below.
Like the content and want to be ahead of the curve? Enter your email below to subscribe - it's FREE!!!!